Table of Contents
Instructors can enable learners to self-register to a course via the Express Sign-In feature.
Self-registration means that learners are provided a course ID or a course link that they would use to enroll themselves in a course. Instructors don’t need to upload files or enroll learners one-by one. They would only need to send a link to learners and let the learners do the rest.
This guide will show you how learners can self-register to enroll to a course. Read through to learn how to do it.
This guide is for
- Super Admin
- Teacher Admin
- Teacher
Step-by-step guide to enable self-registration using email and password
Step 1 – Click to the “SETTINGS” tab on the top of the page of the course you want your learners to self-register to.
Click the specific course you want students to register in. (If you don’t have courses yet, create one first.) Then go to SETTINGS.

Step 2 – Toggle the switch labelled “Enable Express Sign-In” under the “Enrollment Settings” block to “YES“.
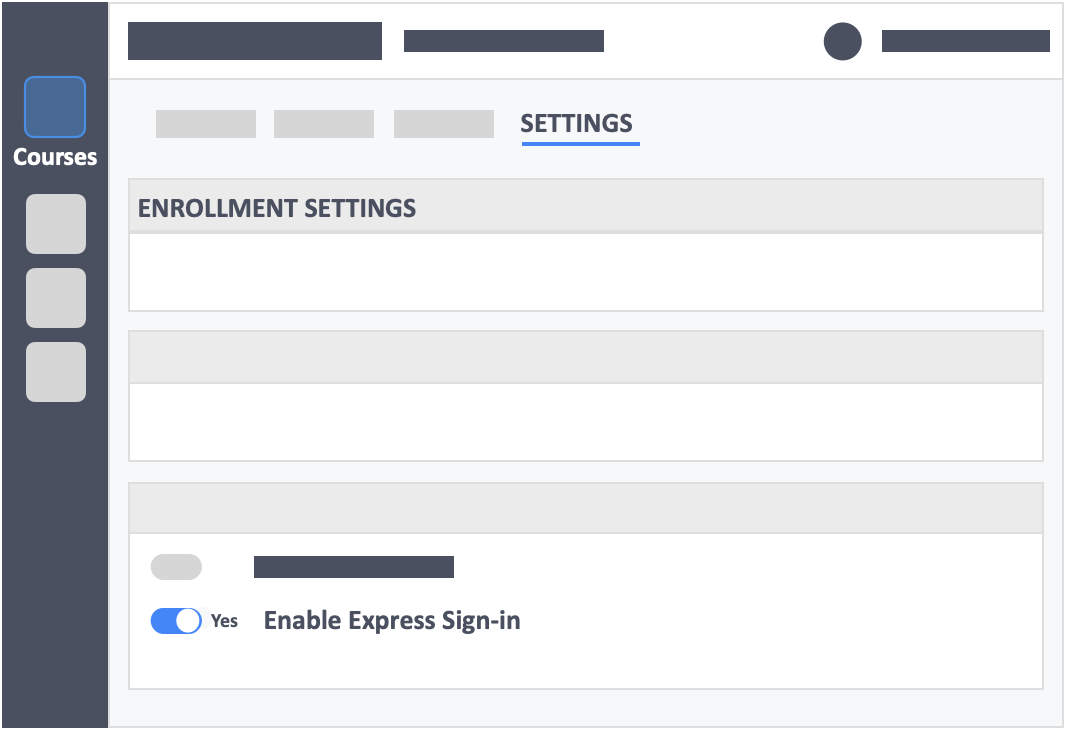
Scroll down to find the switch. Once this is switched on, you should be able to see the following:
- The Express Sign-In URL (This is a direct link you can send the learners to log in. They can just copy and paste this in their browsers to go to the course registration screen).
- The Sign-In QR Code (The QR code leads learners to the course registration screen).
- The Course ID (Learners can enter the Course ID to register to this specific course).
These are three (3) ways the learners can register to the course.
Step 3 – Toggle the switch labelled “Require students to set an email and password” to “YES“.
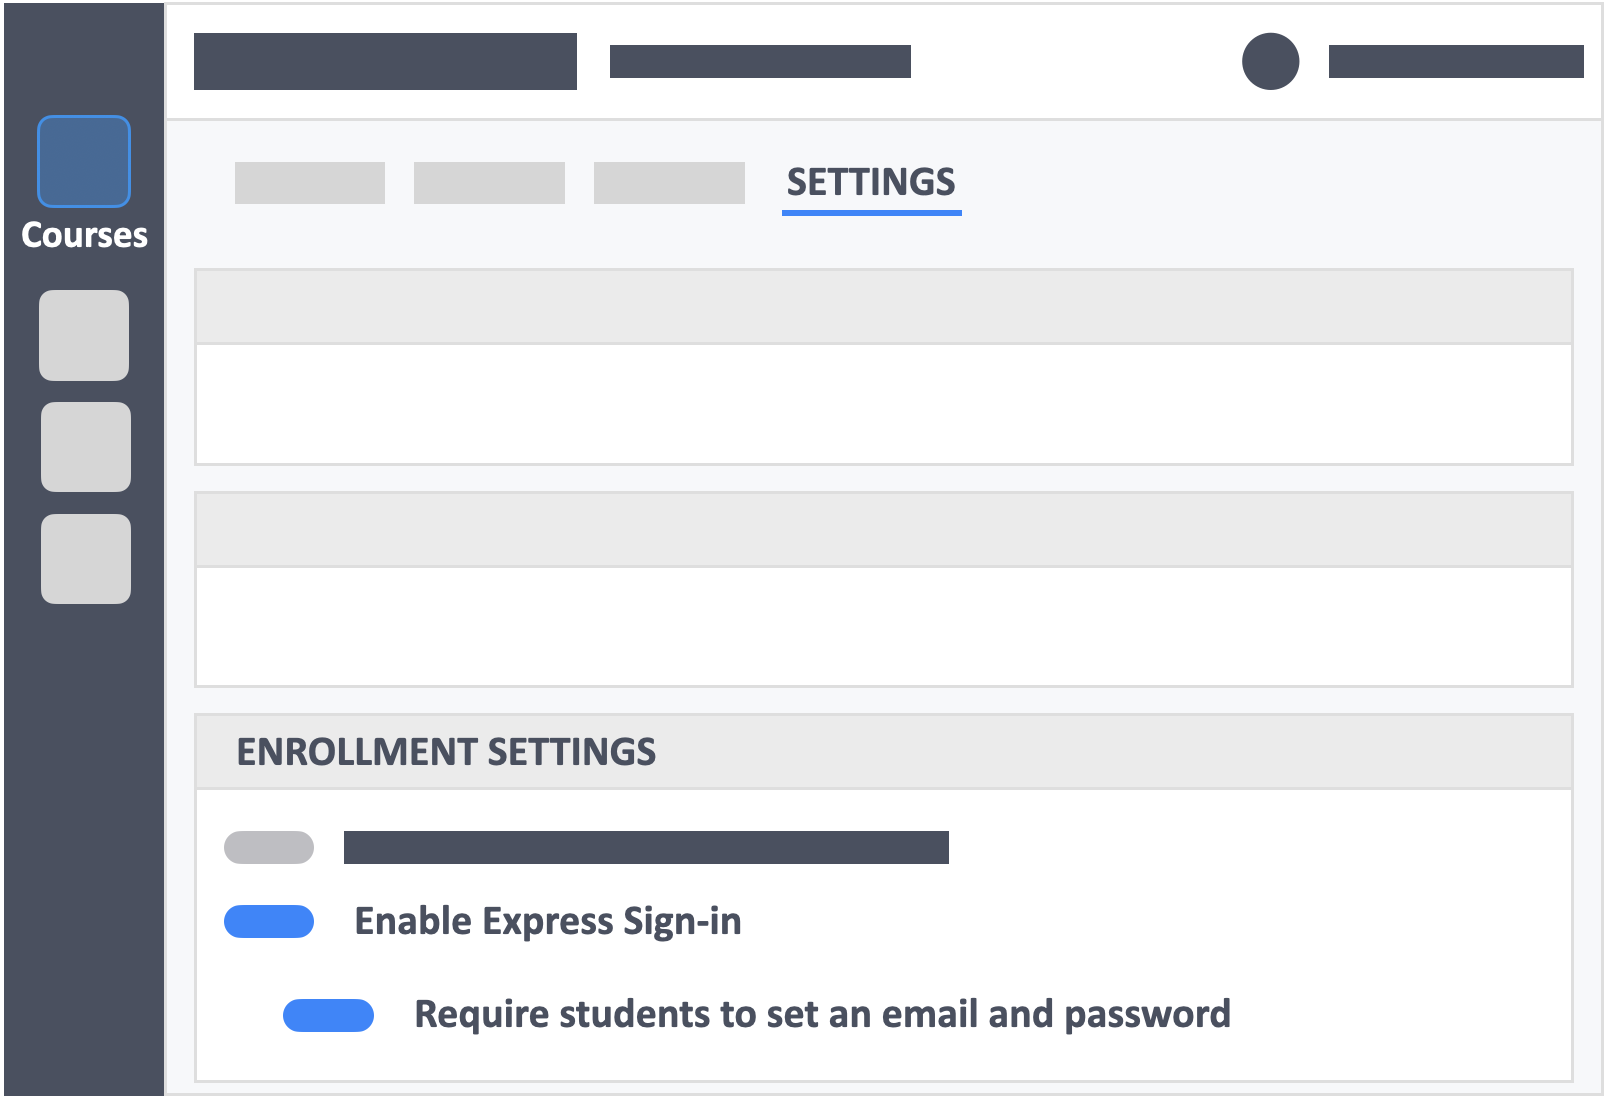
Scroll down to find the switch. Once this is toggled to “Yes”, learners will be required to enter their email and set an account password for InteDashboard.
**If this switch is toggled “No”, it means that the registration is anonymous. Anonymous registration is only for ad hoc training sessions where security of the user is not important. Click here to learn more about anonymous learner registration.
How it’ll look like on the learner’s page.
As mentioned in Step 2, there are three ways a learner can register to the course: (1) by URL (2) by QR code (3) by Course ID. Read on to find out more.
Express Sign-in URL
Learners can simply click the Express Sign-in URL to go to the registration page of your course. They will be asked to enter their email address, name and set a password for their account and finally, click the blue button labelled “Join Course” at the bottom of the page. See a quick video below:
QR Code
You can also screen share the Express Sign-in QR code and ask learners to scan it. The scan will take them to the registration page of your course (the same as above). Similarly, it’ll ask them to enter their email, name, set a password and click the blue button labelled “Join Course” at the bottom of the page. See a quick video below.
Course ID
Another option is to use the Course ID. Ask the learners to login to auth.intedashboard.com, and click the white button labelled “Express Sign in” in the middle of the page. They’ll be asked to enter the “Course ID“, the email, name and set a password for the account. See a quick video below:
Recommendations (Do’s and Dont’s)
Dont’s
⚠️ Do not change the enrollment settings in the middle of the semester. Changing this affects how learners sign-in to InteDashboard and access the course’s activities. Once you’ve set it, keep it.
Do’s
✅You can email the Express Sign-in URL to learners if you want them to register before class starts.
Our recommendation : On the first day of classes, during orientation, you can have learners register to your course in InteDashboard together. If you are using a video conferencing tool, send them the Express Sign-in URL via chat, or screen-share the QR-Code. Once everyone has registered, you can then put your learners in teams.